Here’s how you can DIY this ruffled clay bowl using air dry clay!
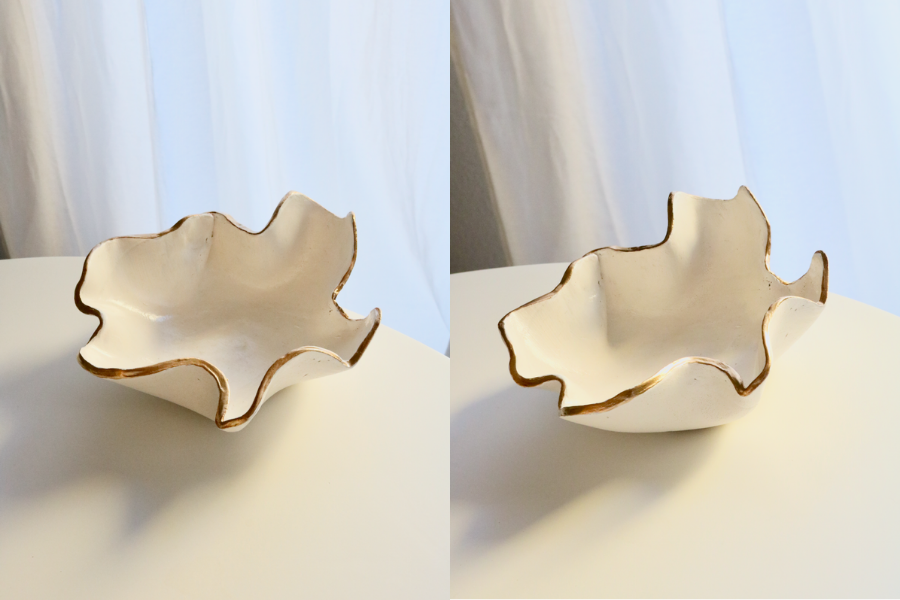
The unique design and organic shape of a ruffled bowl makes it a beautiful statement decor piece for pretty much any table surface in your home like the coffee table, night stand, or console. You can buy them online, but some can be quite pricey and it’s super easy to DIY one using air dry clay!
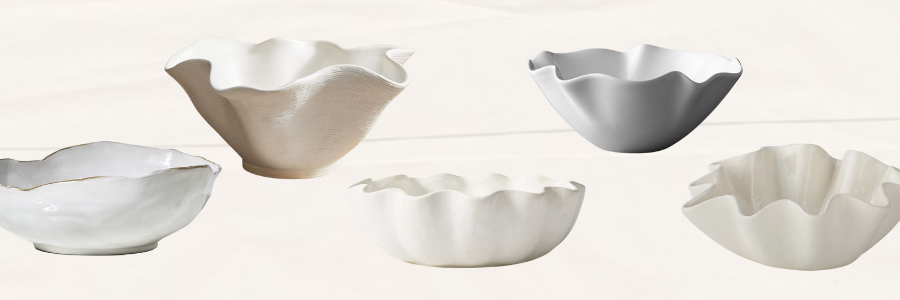
Links to my favorite ruffled bowls from left to right:
- Glazed Ceramic Bowl: https://amzn.to/3BleXnG
- Solana Ceramic Centerpiece Bowl: https://bit.ly/3uUh3cW
- Target Scalloped bowl: https://bit.ly/3g4fKiN
- White Ruffle 11″ Small Bowl: https://bit.ly/3oTw76W
- Regina Andrew Ruffle Ceramic Bowl: https://bit.ly/3oQNaGN
DIY Air Dry Clay Ruffled Bowl Tutorial
Here’s what you’ll need for this project:
- Air dry clay: https://amzn.to/2Ylqu4c (This clay has a very natural, muddy like clay texture. It can get pretty messy and be harder to manage than the DAS air dry clay which is popularly used: https://amzn.to/3rQhvqE )
- Liquid gold leaf: https://amzn.to/3uQXaDs
- Acrylic paint: https://amzn.to/3LE96OO
- Aleen’s spray gloss finish: https://amzn.to/3oStlP5
- Clay rolling pin (Don’t have one? you can use a wine bottle instead): https://amzn.to/3JvrQhH
- Clay cutting knife (I just used an oil paint knife lying around): https://amzn.to/3JwYMGA
- Things you should already have at home: Bowl and saran wrap
Written Tutorial
(Check out the video tutorial below!)
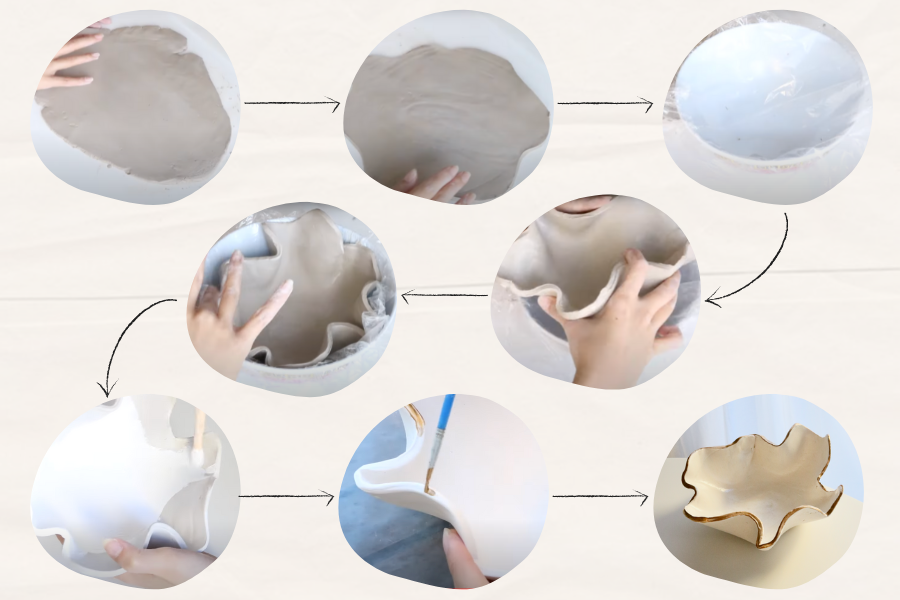
- Start with a ball of clay and then roll it out. Make sure that it is not too thin because the bowl can crack when drying or be too fragile).
- Cut out wavy lines around the edge using your clay knife tool. These will be your ruffles so get creative with it! I drew around freely to create a more organic look that isn’t symmetrical. You could even rip out piece of clay for a more rougher edge.
- Line your bowl with saran wrap so that your clay doesn’t stick to the bowl as it dries.
- Gently lift the clay piece and fold it into a taco bowl using your hands. Then insert it into the saran wrapped bowl.
- Smoothen out the edges and make any last minute changes to your ruffles. I cut out and reshaped some of my ruffles, created deeper folds, and smoothened out areas with water. Your clay piece will dry in this bowl and maintain its shape!
- Let it dry for at least 24-48 hours (depending on how thick you made your bowl).
- Once dry, sand down rough edges if you’d like.
- Give it a coat of acrylic paint! I created this egg shell like color. Then I gave it band of gold around the edges using liquid gold leaf. Be very careful when using this! The fumes are strong so I recommend taking it outside and wearing a mask.
- Lastly, seal it up with Aleene’s spray gloss finish!
Video Tutorial
Hope this air dry clay ruffled bowl tutorial is helpful for when you create yours!
Thanks for reading!
♥ Eunice
HI dear, thanks for this.
Really nice. I would like to do one but for a candle vessel, Have you tried before? Would it be safe?
Hi, thanks so much! I have not tried this for a candle vessel so I’m not too familiar – I have a feeling flame might not be good for the acrylic paint and sealant I used, but you could look it up for aleene’s spray gloss finish. Hope that helps (: